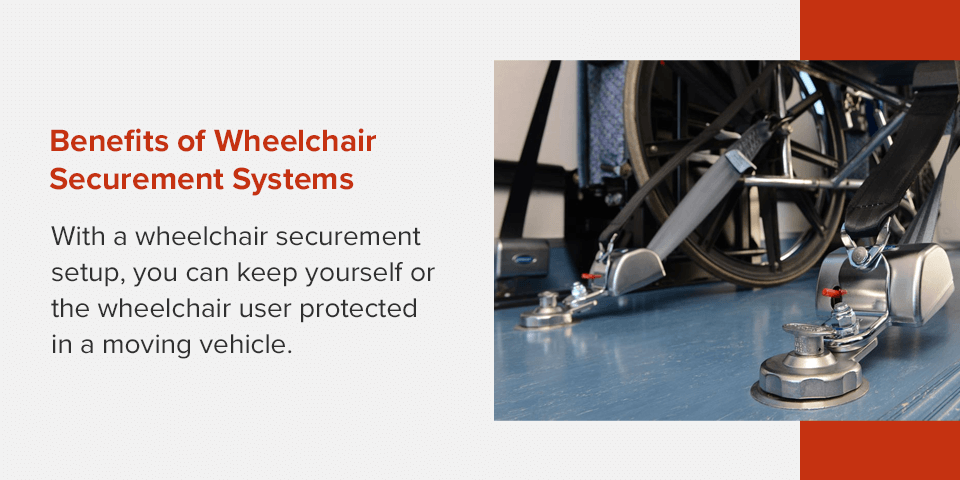
Every time a wheelchair user enters a van, safety depends on one critical action: properly securing the wheelchair. Without it, even a minor bump or sudden stop can turn into a life-threatening situation. Over 3 million Americans rely on wheelchairs for mobility, and for them, knowing how to safely anchor their device in a vehicle isn’t optional—it’s essential. Whether you’re a caregiver, driver, or passenger, mastering the correct securement process ensures both the occupant and the wheelchair remain stable during transport.
Improperly secured wheelchairs can become dangerous projectiles in a collision. Federal safety standards like FMVSS 207/208/209 and ANSI/RESNA WC19 exist to prevent such risks, but compliance starts with proper use. This guide walks you through the best systems, correct attachment methods, and a foolproof step-by-step process to secure any wheelchair in a van—safely and confidently.
Choose the Right Wheelchair Securement System
Manual Tie-Downs: Reliable and Budget-Friendly
Manual tie-downs are the most widely used system, especially in rental and shared-use vans. These consist of four adjustable straps—two front, two rear—that connect from floor-mounted anchors to the wheelchair frame. They’re affordable, durable, and compatible with nearly all wheelchair types.
To use:
– Engage the wheelchair brakes.
– Attach J-hooks to strong frame points.
– Pull slack through cam levers and tighten until snug.
While effective, manual systems require physical effort and often assistance, making them best suited for passengers with caregivers. They’re also prone to user error if not tightened correctly or if attached to weak points.
Critical Warning: Never attach straps to wheels, armrests, or footrests—only to rigid, non-moving parts of the frame.
Retractable Systems: Faster and More Independent
Retractable systems, such as the Q’Straint QLK-150 or BraunAbility Retractable Restraints, offer self-tensioning straps that reduce slack automatically. Mounted on L-track flooring, they retract when not in use, minimizing clutter and tripping hazards.
Operation is simple:
– Press the release lever to extend the strap.
– Hook onto D-rings or frame points.
– Let the system retract slightly, then apply 1–2 clicks of tension with the cam lever.
These systems support semi-independent users who want a quicker, more consistent securement process without full manual effort.
Docking Systems: Full Independence for Drivers
For wheelchair drivers, docking systems provide complete autonomy. A floor-mounted dock locks onto a bracket under the wheelchair with a push-button mechanism. Once aligned, driving forward engages the lock with an audible click.
Benefits include:
– No straps to handle.
– Eliminates human error.
– Enables driving directly from the wheelchair.
However, docking systems are fixed in position, require professional installation, and only work with compatible, WC19-compliant wheelchairs modified for transit.
Pro Tip: Always verify compatibility between your wheelchair model and the docking system before installation.
Install Securement Tracks and Anchors Properly
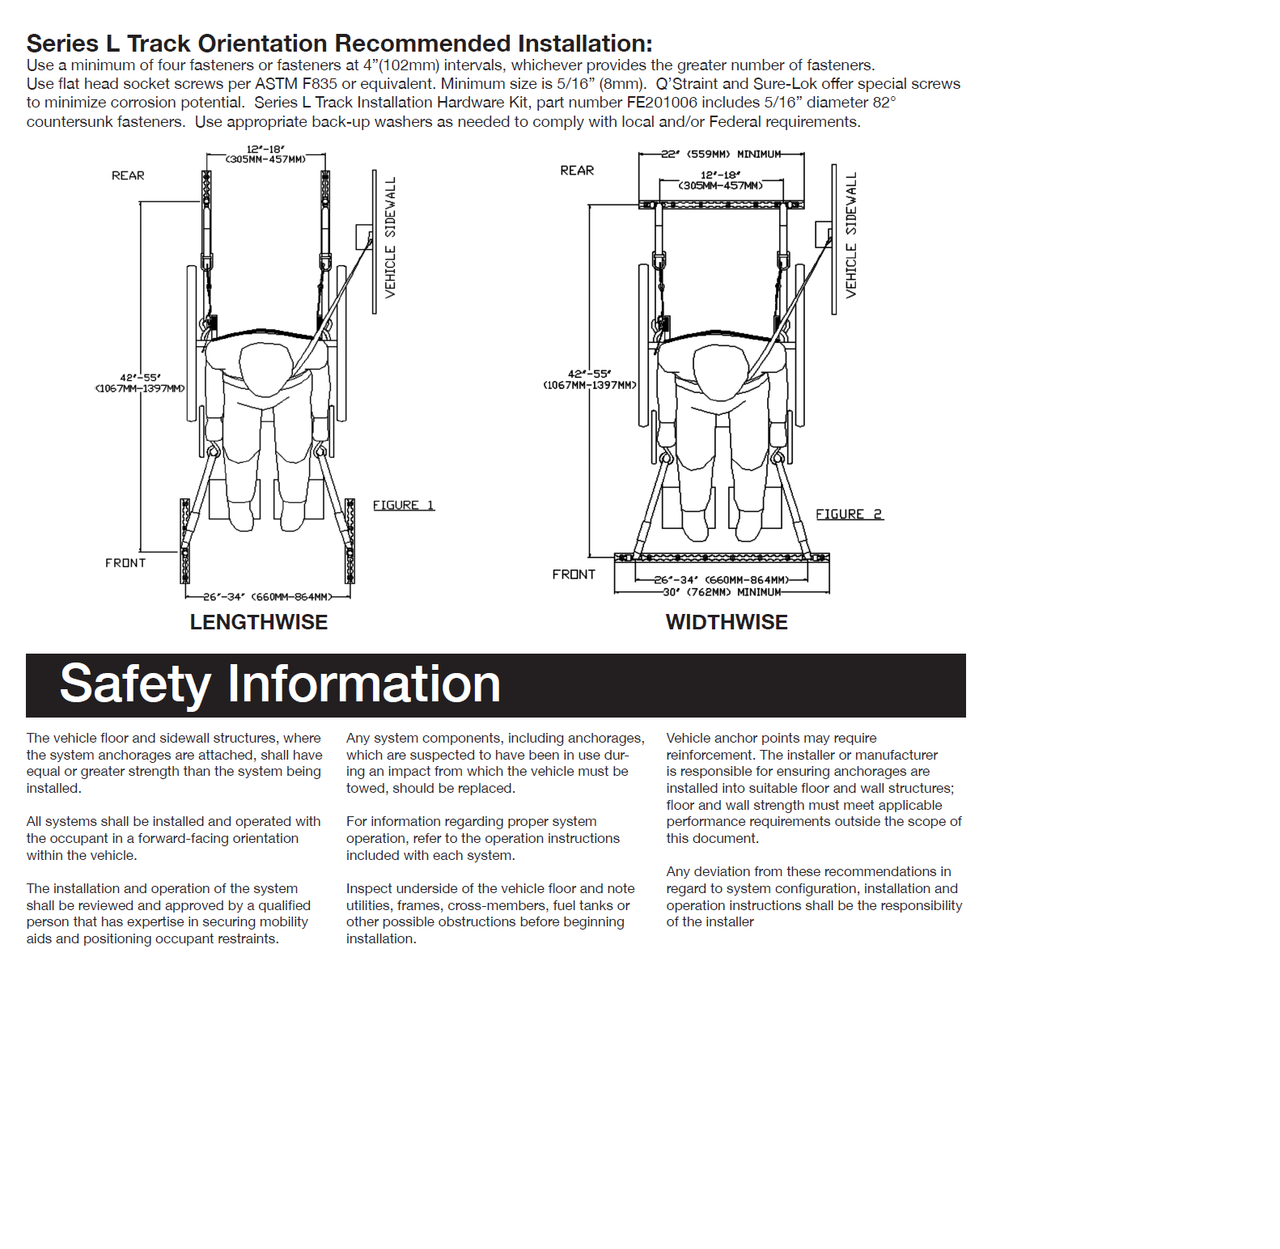
L-Track: Maximum Flexibility and Compatibility
L-track is an aluminum rail bolted to the van floor with a distinctive “L”-shaped groove and machined holes every 2 inches. It allows tie-down units to slide and lock into place wherever needed—perfect for accommodating different wheelchair sizes or multiple users.
Advantages:
– Adaptable positioning.
– Supports both manual and retractable systems.
– Standard in most modern accessible vans.
Installation must be done professionally, with bolts secured directly to the vehicle frame for maximum strength.
Fixed Floor Anchors: Simpler but Less Flexible
Fixed anchors are single-point loops or brackets permanently mounted to the floor. They’re less versatile than L-track but sufficient for dedicated seating positions, such as a regular front passenger spot.
Best Practice: Use L-track in multi-user environments; reserve fixed anchors for permanent setups.
Identify the Correct Wheelchair Attachment Points
Power Wheelchairs: Use D-Rings or Manufacturer Points
Most power wheelchairs come with D-rings or integrated securement points designed for J-hook attachment. Always consult the manufacturer’s manual to confirm approved locations.
Never attach to:
– Motor housings
– Drive wheels
– Control levers
– Detachable side guards
Using unauthorized points risks equipment failure during transit.
Manual Wheelchairs: Find Rigid Frame Junctions
Manual chairs lack standardized tie-down points. Focus on strong, welded sections of the frame such as:
– Frame-to-wheel connections
– Cross-brace welds
– Side rail junctions
Avoid telescoping tubes, folding joints, or adjustable components—they can collapse under stress.
WC19 Wheelchairs: Built for Transit Safety
Wheelchairs meeting ANSI/RESNA WC19 standards have four designated securement points and are crash-tested for vehicle use. These are ideal for transportation because they eliminate guesswork about where to attach straps.
Check the Label: Look for a WC19 compliance tag on the chair.
Follow the Step-by-Step Securement Process
Position the Wheelchair Correctly
Roll the wheelchair into the designated area, facing forward. Center it between the side walls and ensure there’s enough clearance for door closure and movement.
- Engage the brakes immediately.
- For power chairs, turn off the joystick and power switch to prevent accidental activation.
Misalignment increases the risk of improper strap angle and reduced stability.
Attach All Four Tie-Down Straps
Use a four-point system—two at the front, two at the rear—for balanced restraint.
Steps:
1. Connect front straps to front frame points.
2. Connect rear straps to rear frame points.
3. Ensure J-hooks are fully seated and cannot slip off.
Straps should run diagonally from floor anchors to the wheelchair, forming an “X” pattern for optimal force distribution.
Visual Cue: Straps should not rub against tires or moving parts.
Tighten Straps to Proper Tension
Remove all slack, then tighten using the cam lever:
– For manual systems: pull down until resistance is firm.
– For retractable systems: add 1–2 clicks after auto-retraction.
The golden rule: a single finger should fit under the strap when properly tensioned. Too loose allows movement; too tight can damage the frame.
Test for Stability Before Driving
After tightening, test the chair:
– Push gently from the front, back, and sides.
– Acceptable movement: less than 1 inch in any direction.
If the chair shifts more than that, re-tighten or reposition the straps.
Expert Note: Re-check tension after driving over rough roads or long trips—vibration can loosen straps.
Secure the Occupant with a Seat Belt
Lap and Shoulder Belt Are Mandatory
Tie-downs secure the wheelchair—not the person. The factory-installed lap and shoulder belt must always be used to protect the occupant.
Proper fit:
– Lap belt: low across the hips, not the stomach.
– Shoulder belt: across the chest, resting on the shoulder—never the neck or face.
Failure to wear a seat belt dramatically increases injury risk in a crash.
Use Seat Belt Adapters When Needed
If the original belt doesn’t reach, use an adapter:
– Standard L-Track Adapter: attaches to floor track, extends reach.
– Rigid Adapter: stays upright for easier self-use, ideal for independent drivers.
These replace the factory receiver and are essential for anyone riding in their wheelchair.
Pro Tip: Store the seat belt buckle out of the way during entry/exit to avoid snagging on clothing or controls.
Avoid Common Securement Mistakes
Skipping the Brakes
Forgetting to engage the wheelchair brakes is one of the most frequent errors. This can cause the chair to roll during setup, leading to misalignment or injury.
Fix: Make brake engagement the first step—every time.
Attaching to Weak Points
Hooking straps to wheels, armrests, or footrests creates a dangerous false sense of security. These parts are not designed to withstand crash forces.
Solution: Only attach to solid, structural frame components or manufacturer-approved D-rings.
Over-Tightening Straps
Excessive tension can deform lightweight frames or damage carbon fiber components. It also makes removal harder and increases wear on straps.
Rule: Snug is enough—no white-knuckle tightening.
Ignoring the Seat Belt
Some users believe the wheelchair is “secure enough” without a seat belt. This is a life-threatening misconception.
Fact: In a collision, an unrestrained occupant can be thrown forward at full speed—even if the chair stays in place.
Misaligned Docking
With power systems, failing to align the locking bolt with the V-groove guide prevents full engagement. No click means no lock.
Fix: Drive slowly and straight into the dock. Listen for the audible confirmation.
Meet Safety Standards and Maintain Your System
All accessible vans used for public or commercial transport must comply with ADA and FMVSS 207/208/209 regulations. Rental fleets are regularly inspected to ensure compliance.
For long-term safety:
– Inspect straps monthly for fraying or damage.
– Clean L-track grooves to prevent debris buildup.
– Lubricate moving parts per manufacturer guidelines.
– After any collision, have the securement system professionally inspected—even if no damage is visible.
Reminder: Register your system with the manufacturer and follow recommended maintenance schedules from providers like BraunAbility or Q’Straint.
Final Note: Securing a wheelchair in a van is not optional—it’s a lifesaving procedure. By choosing the right system, using proper attachment points, tightening correctly, and always wearing a seat belt, you ensure a safe journey every time. Whether you’re using manual straps, retractable units, or a full docking system, consistency, training, and maintenance are key. When in doubt, consult a certified mobility specialist from providers like Superior Van & Mobility or BraunAbility to get personalized setup and support. Stay safe, stay secure, and keep moving forward.