Choosing the right wheelchair starts with one crucial measurement: seat width. Getting this number wrong can lead to serious consequences—pressure sores, poor posture, inefficient movement, and even long-term joint damage. Whether you’re a caregiver, clinician, or user, knowing how to measure wheelchair width correctly is essential for comfort, safety, and independence.
An ideal seat fits snugly but not tightly—supporting the hips without pinching or restricting movement. Too narrow, and you risk skin breakdown and difficulty transferring. Too wide, and propulsion becomes inefficient, posture deteriorates, and fatigue sets in quickly. This guide walks you through every step of measuring wheelchair width using professional techniques from rehabilitation experts and durable medical equipment (DME) specialists. You’ll learn how to avoid common mistakes, account for clothing and cushions, and verify real-world fit before making a purchase.
Find the Widest Point of the Hips

The foundation of accurate seat width measurement begins with locating the correct anatomical landmark: the greater trochanters—the bony protrusions at the top of the femur, just below the hip joint. For most people, this is the widest part of the hips when seated and the key reference point for sizing.
Locate the Greater Trochanters by Hand
Place your fingers on the side of the hip, just below the iliac crest (top of the pelvis), and feel downward until you detect a firm, rounded bump. That’s the greater trochanter. Repeat on the other side to confirm symmetry.
Pro Tip: Have the person sit upright with feet flat on the floor and knees bent at 90 degrees. This mimics natural sitting posture and ensures tissue isn’t compressed or shifted unnaturally.
Ensure Proper Sitting Position
Accuracy depends on consistent body alignment. Make sure the individual:
– Sits on a firm, flat surface, like an exam table or hard chair (never a couch or soft bed)
– Wears typical daily clothing and shoes
– Maintains a neutral spine (no slouching or leaning)
– Keeps legs parallel and uncrossed
Soft surfaces compress under body weight, flattening soft tissue and leading to under-measurement. This can result in a seat that’s too narrow once used in real conditions.
Measure Hip Width Correctly

Once the user is positioned properly, it’s time to take the actual measurement.
Use a Straight Tape Measure
Place a flexible tape measure from the outside of one hip to the outside of the other, keeping it horizontal and straight. Do not wrap the tape around the body—it should form a straight line across the hips.
Warning: Wrapping the tape adds up to 2 inches of false width due to the arc, potentially resulting in a wheelchair that’s too large and unstable.
Record the measurement in inches. Most wheelchairs come in 2-inch increments (16″, 18″, 20″, etc.), so precision matters.
Add 1–2 Inches for Clearance
To determine the final seat width, add 1 to 2 inches to the measured hip width:
– +1 inch for active users who self-propel and need a snug fit for better control
– +2 inches for individuals with limited mobility, sensory impairments, or those wearing bulky clothing or orthotics
Example:
– Measured hip width: 16 inches
– Add 1 inch → 17 inches → Round up to 18-inch seat (standard size)
Always round up to the next available size if the number falls between standard widths.
Check Shoulder and Knee Width for Full Clearance
Seat width isn’t the only factor—shoulders and knees must also fit within the frame comfortably.
Measure Shoulder Width
Using the tape measure, find the widest point across the shoulders, typically near the acromion process (top of the shoulder blades). If shoulders are more than 1–2 inches wider than the seat, the user may experience rubbing, restricted arm motion, or difficulty passing through narrow spaces.
Solution: Consider a wider frame, contoured backrest, or adjustable armrests to improve clearance.
Assess Knee Width When Seated
Measure across the widest part of the knees with legs bent at 90 degrees. This helps determine:
– Whether leg rests need to be elevated or angled outward
– If swing-away footrests are necessary for transfers
– Clearance under desks, tables, or in vehicles
If knees extend beyond the seat width, it may indicate the need for a broader base or customized components.
Select the Correct Seat Width Size
With all measurements in hand, choose the appropriate standard seat width.
Match to Common Wheelchair Sizes
Standard adult seat widths include:
– 16″, 18″, 20″, 22″
– Bariatric models: 24″–30″+
– Pediatric chairs: 8″–14″
Always select the next standard size up after adding clearance. For example:
– Hip width: 19.5″
– Add 1.5″ → 21″ → Choose 22-inch seat
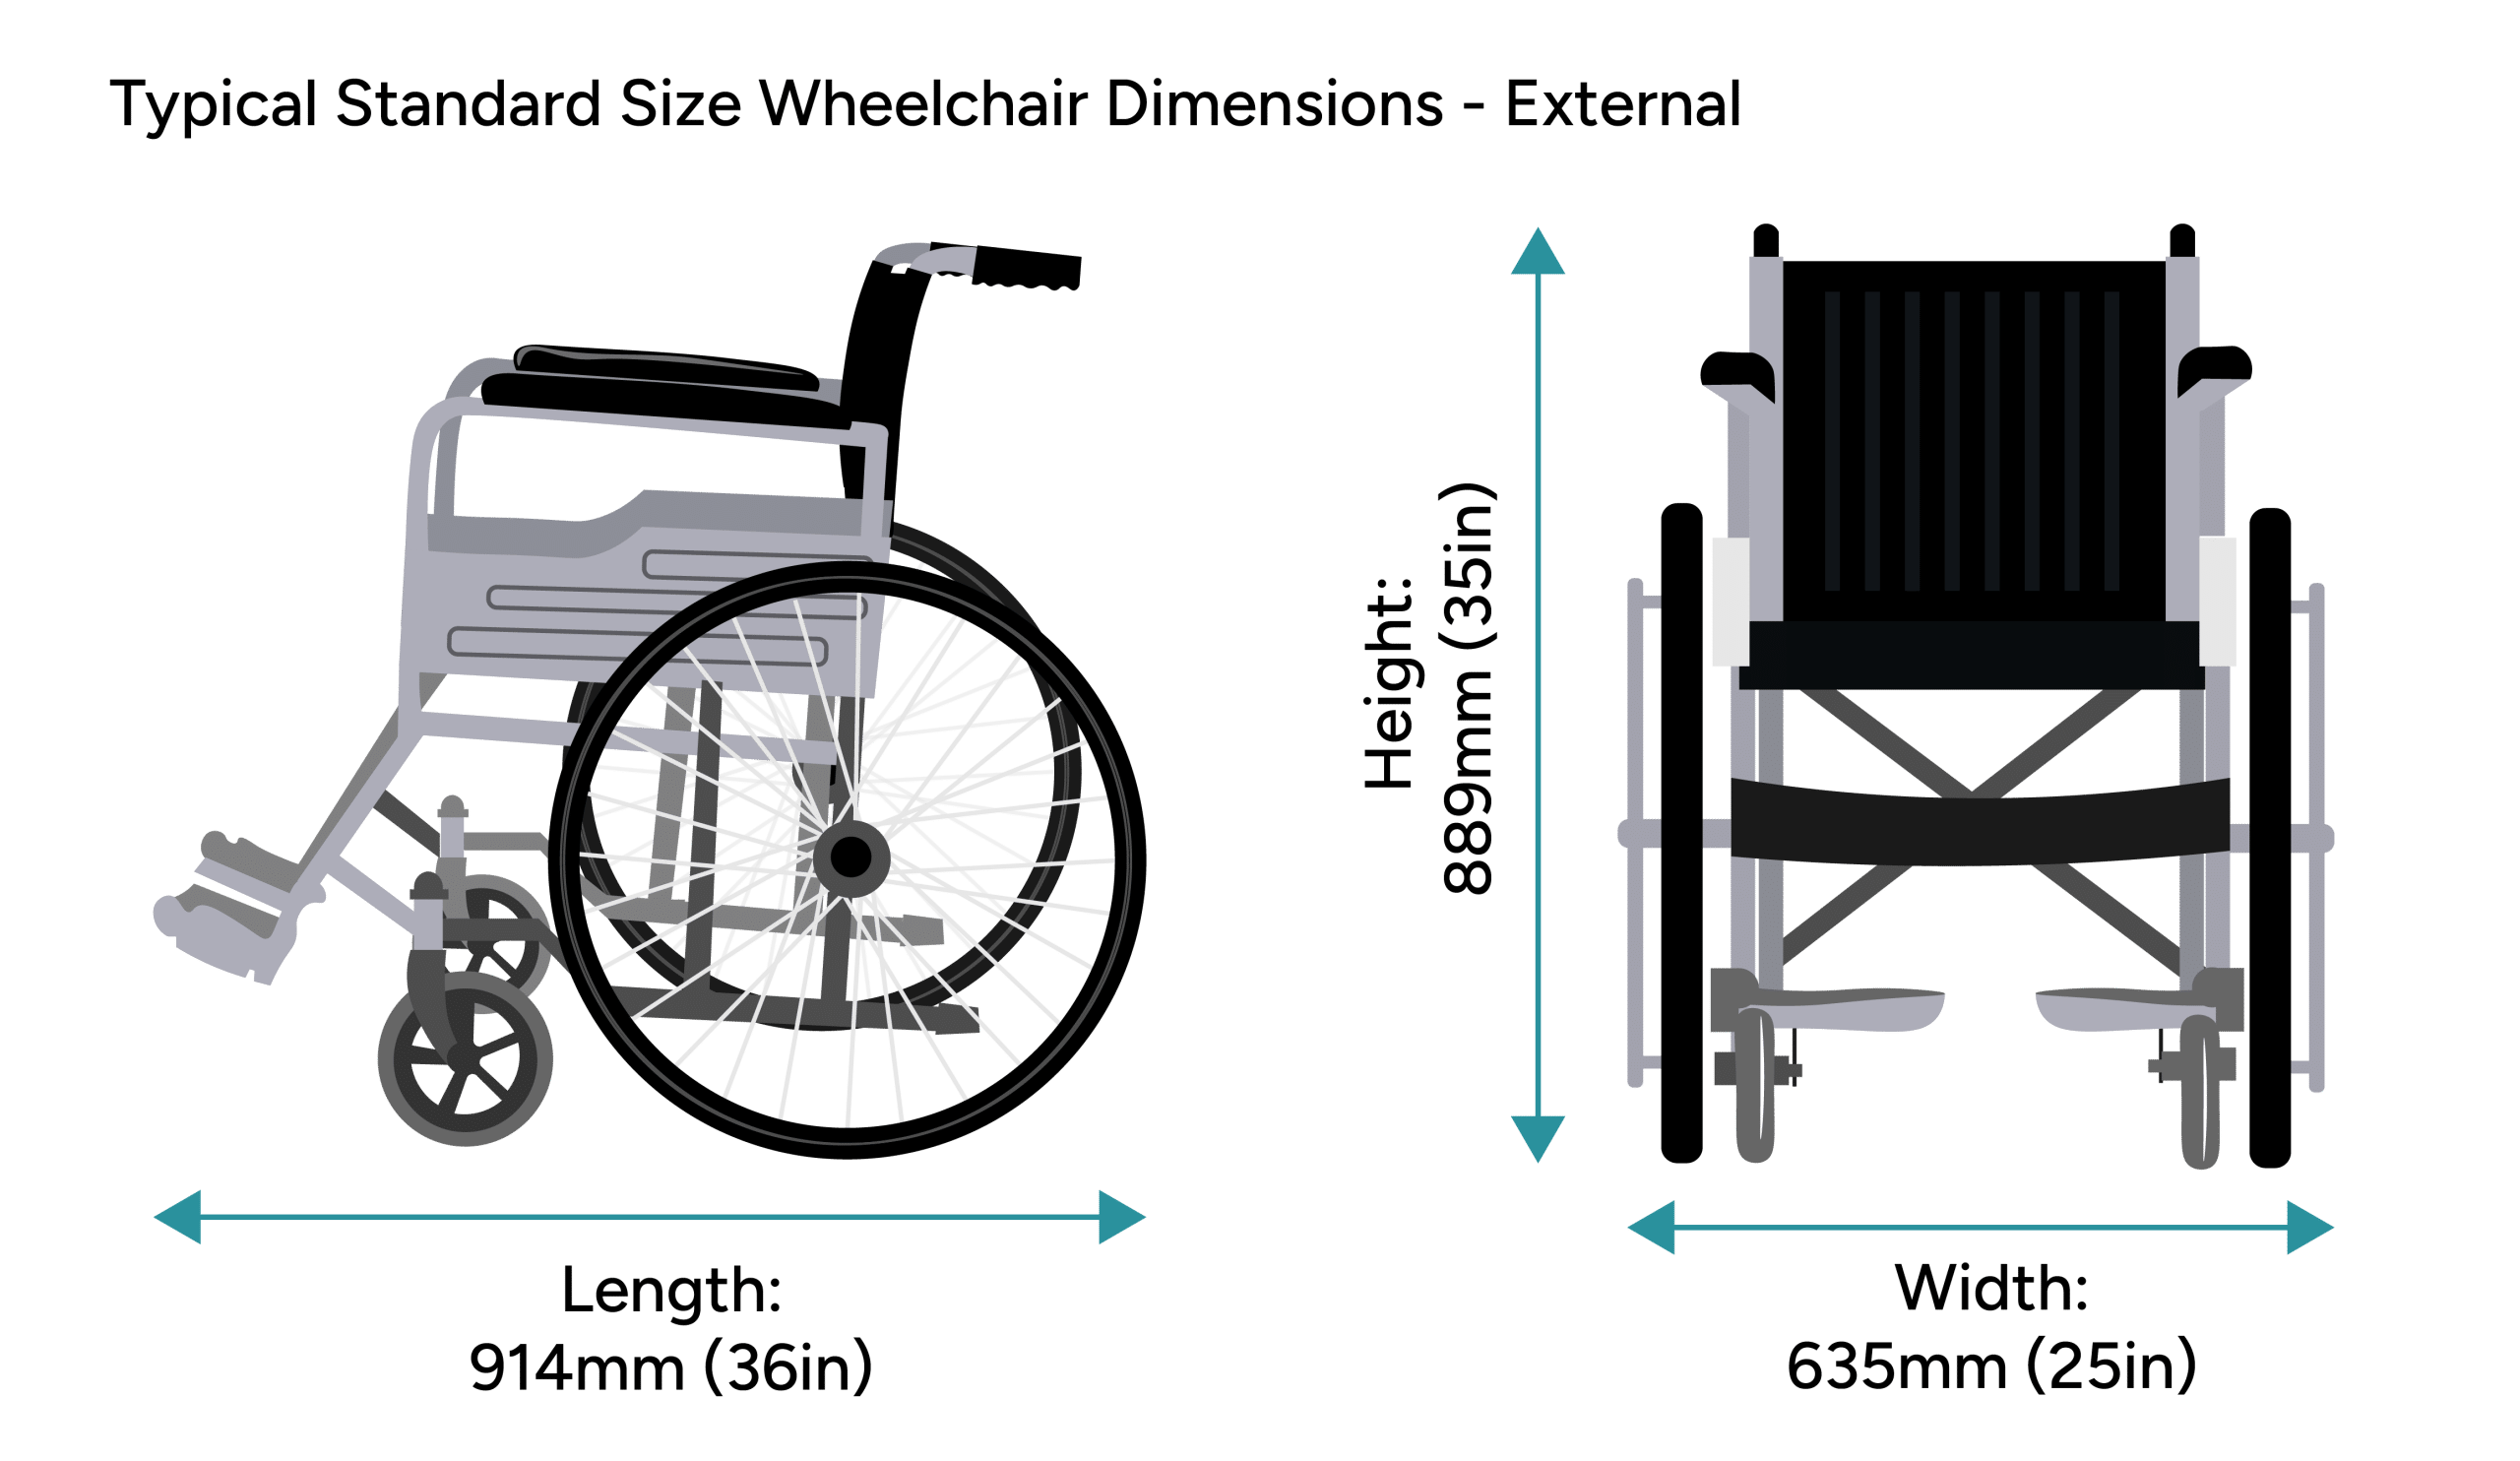
Account for Total Wheelchair Width
Remember: seat width ≠ total chair width. The full chair—including wheels, armrests, and hardware—is typically 4–6 inches wider than the seat itself.
Example:
– 18″ seat → ~24″ total width
– 22″ seat → ~28″ total width
Verify that the total width fits through doorways (minimum 32″), bathrooms, and elevators. The ADA recommends 34 inches for optimal accessibility.
Measure the Wheelchair Frame Directly
After selecting a model, confirm its actual dimensions.
Check Outside Seat Rail Width
Place the wheelchair on a level surface. Measure from the outside edge of one seat rail to the opposite, at both the front and middle of the seat.
A chair labeled “18-inch seat” may measure 20 inches externally, with 2 inches taken up by padding, armrests, and frame thickness.
Estimate Usable Seat Width
Subtract 1–2 inches from the external measurement to estimate internal (usable) space:
– 1 inch for thin or flat cushions
– 2 inches for thick, contoured, or gel cushions
Pro Tip: Test sit whenever possible. Even the most accurate measurements can’t replace real-world comfort and function.
Measure Other Key Dimensions for Full Fit
Seat width is just one part of a comprehensive seating assessment.
Seat Depth
Measure from the back of the buttocks to the crease behind the knee (popliteal fold) with knee bent at 90°.
– Ideal: 1–2 inches between seat edge and popliteal fold
– Too deep → pressure behind knees
– Too short → poor thigh support
Seat Height
Measure from the floor to the underside of the knee (popliteal height), then add 1–2 inches for footrest clearance.
– Goal: Feet rest flat without dragging, heels not pressing into footplates
Backrest Height
From the seat surface to:
– Bottom of shoulder blades for standard support
– Base of neck for full trunk/head support
Adjust based on posture needs and wheelchair type (manual vs. power).
Armrest Length
With elbow bent at 90°, measure from elbow to fingertips. Ensures arms rest comfortably during sitting and transfers.
Critical: Perform all measurements with the cushion in place, as it affects depth, height, and effective seat width.
Avoid Common Measurement Mistakes
Even small errors can cause long-term discomfort.
Don’t Wrap the Tape Measure
A curved tape overestimates width. Keep it straight and horizontal.
Avoid Soft Surfaces
Couches or padded mats compress tissue, leading to under-measurement.
Include Clothing and Cushions
Measure with typical attire (e.g., jeans, winter pants) and the intended cushion installed.
Reassess Regularly
Body shape changes with weight, edema, or muscle atrophy. Re-measure every 6–12 months, or sooner after medical changes.
Red Flags of Poor Fit:
– Redness or chafing on hips
– Uneven wear on pants
– Difficulty pushing wheels
– Leaning to one side
Adjust for User Type and Lifestyle
Seat width should match both anatomy and functional goals.
Active Self-Propelled User
- Use +1 inch clearance
- Choose narrower profiles (16″ or 18″)
- Prioritize lightweight, maneuverable frames
Immobile or Elderly User
- Allow +2 inches for comfort and tissue expansion
- May need bariatric or custom models if over standard sizes
Growing Child or Pediatric User
- Use adjustable or modular wheelchairs
- Re-measure every 3–6 months
- Involve pediatric OT or PT for developmental needs
Use Professional Tools and Forms
For insurance approval or clinical documentation, standardized forms ensure accuracy.
Anatomical Assessment Form
Documents hip, shoulder, knee, and seat dimensions. Required for Medicare, Medicaid, and private insurance.
NRRTS Evaluation Form
Covers functional mobility, transfers, and equipment justification. Used by certified rehab suppliers.
Case Evaluation Form
Used during trial periods for high-end chairs (e.g., Permobil, Broda). Supports funding decisions with real-world data.
Verify Fit Before Finalizing Purchase
Never skip a test sit.
Conduct a Trial Run
Have the user sit for 15–30 minutes while:
– Navigating doorways and hallways
– Attempting self-propulsion
– Performing a transfer
– Sitting at a table
Observe for pinching, rubbing, or instability.
Involve a Seating Specialist
For complex cases (spasticity, contractures, asymmetry), consult an OT or PT trained in mobility seating. They can recommend custom cushions, lateral supports, or postural adjustments.
Maintain and Reassess Over Time
A perfect fit today may not last.
Schedule Regular Checkups
Re-measure:
– Every 6 months for stable adults
– Every 3–6 months for children or those with changing conditions
– Immediately after significant weight change or injury
Monitor for Wear Signs
Check for:
– Frayed fabric at hip points
– Indentations in cushion foam
– Asymmetric wheel wear
– Increased effort to push
These may signal the need for resizing or upgrades.
Final Note: Measuring wheelchair width is more than just a number—it’s about matching anatomy, function, and environment. By following these steps, you ensure the chair enhances independence instead of limiting it. Whether for daily use, medical approval, or long-term care, precision in measurement leads to better comfort, mobility, and quality of life. Always prioritize accurate, repeatable methods—and when in doubt, seek expert help.