Loading a wheelchair into a car might seem like a simple task—until you’ve done it daily with strain, frustration, or fear of injury. For millions of manual and power wheelchair users and their caregivers, this routine act is a physical and emotional hurdle that impacts independence, safety, and quality of life. Improper lifting can lead to shoulder injuries, back pain, or damaged equipment. Yet with the right techniques, tools, and preparation, loading your wheelchair can become fast, safe, and even manageable solo. This guide delivers clear, actionable steps to load any wheelchair—folding, rigid, or power—into any vehicle, from compact cars to minivans. You’ll learn how to protect your body, avoid common mistakes, and choose cost-effective solutions that fit your strength, budget, and lifestyle.
Master Safe Lifting Techniques

Bend Knees, Not Your Back
Every time you lift a wheelchair, your body takes on weight that can exceed 40 pounds—even more for power models. To protect your spine, bend at the knees and keep your back straight. Use your leg muscles to drive the lift, not your lower back. Keep your shoulders aligned over your hips and avoid twisting your torso. If you need to turn, pivot your feet instead of rotating at the waist.
Why it matters: Over 70% of manual wheelchair users experience shoulder pain, and improper lifting during car transfers is a leading contributor to musculoskeletal injury.
Grip the Frame, Not the Wheels
Never lift by the armrests, wheels, or footrests. These components aren’t built to support the full weight of the chair and can snap or slip unexpectedly. Always grip the main frame or designated lifting handles near the rear canes. This gives you better control and prevents sudden shifts during the lift.
Keep the Chair Close and Controlled
Hold the wheelchair close to your body throughout the lift to reduce strain on your arms and shoulders. Before lifting, tilt the chair backward slightly using the handles. This shifts the center of gravity, making it easier to clear the trunk lip and reducing the force needed to lift.
Pro tip: Practice the motion at home with an empty trunk. Repetition builds muscle memory and reduces injury risk over time.
Prepare the Wheelchair and Vehicle

Remove Detachable Parts
Before lifting, take off all removable components:
– Footrests
– Armrests
– Seat and back cushions
– Trays or side tables
– Anti-tippers (on power chairs)
This reduces weight by up to 15–20 pounds and makes the chair more compact. Store accessories inside the cabin to prevent loss or exposure to weather.
Clear and Protect the Loading Zone
Sweep debris from the trunk or cargo floor. Lay down a blanket, mat, or plastic liner to prevent scratches and help the chair slide. For frequent use, install trunk edge guards to protect against long-term wear from repeated loading.
Visual cue: Scuff marks on the trunk lip are a clear sign you need added protection.
Load a Manual Wheelchair Correctly
Fold the Chair Properly
Most manual wheelchairs fold by pulling up on the center of the seat fabric, collapsing the X-frame. Some models have a folding handle—use it to avoid pinched fingers. Ensure the backrest lies flat and doesn’t stick out. Never force a stiff hinge; check for obstructions or damaged parts.
Warning: Forcing the frame can cause permanent damage. If the chair doesn’t fold smoothly, inspect the joints and clean any debris.
Lift and Load into Trunk
- Roll the folded chair close to the open trunk.
- Tilt it backward using the handles.
- Bend your knees, grip the frame, and lift using leg strength.
- Swing the front wheels upward to clear the trunk edge.
- Slide or lower the chair in, placing it on its side if space is tight.
Space-saving tip: In small trunks, position the chair diagonally or with the handles facing the rear for easier retrieval.
Load into Cabin (No Trunk Access)
If the trunk is too small or inaccessible:
– Remove rear wheels and armrests (if quick-release).
– Slide the frame between or behind front seats.
– Lay it flat along the floor or seat base.
– Use seat belts to secure loose parts.
Vehicle hack: Two-door cars often have wider rear door openings, making it easier to fit long frames.
Unload Without Injury
Slide and Tilt Safely
- Pull the chair to the edge of the trunk.
- Tilt it backward until the front wheels touch the ground.
- Use your legs to lower the back section gently.
- Unfold completely and reattach components.
Common mistake: Rushing the unfold—this can pinch fingers. Keep hands flat on the seat during deployment.
Reassemble in Order
Reattach in this sequence:
1. Rear wheels
2. Footrests
3. Cushions
4. Armrests
Engage brakes before sitting. Test stability on flat ground before moving.
Handle Power Wheelchairs Safely
Disassemble When Possible
Some power chairs (e.g., Whill C2, Comfygo IQ 7000) break into 2–5 pieces:
– Seat/base
– Batteries (10–15 lbs each)
– Armrests
– Foot platform
Each piece typically weighs 30–60 lbs—manageable for repeated lifting if you use proper form.
Pro tip: Label parts and store tools in a zip bag attached to the chair for quick reassembly.
Remove Batteries First
Always disconnect and remove lithium-ion batteries before transport. This:
– Reduces weight
– Prevents electrical hazards
– Meets airline regulations
– Protects battery life
Store batteries upright in the cabin, away from extreme heat or cold.
Use Assistive Loading Devices
Install a Trunk Hoist
In-vehicle hoists (e.g., Brig Ayd 4-way, Smart Lifter LC) use a crane-like arm to lift power chairs up to 200+ lbs. They:
– Mount permanently in the trunk or cargo area
– Operate via remote control
– Allow fully assembled loading
Best for: SUVs or minivans with flat cargo floors and structural support.
Try a Hitch-Mounted Carrier
Attaches to a Class III or IV trailer hitch and lifts the chair onto a rear platform. Benefits:
– No lifting into the trunk
– Weather-protected enclosures available
– Ideal for users with limited upper-body strength
Check first: Confirm your vehicle’s tongue weight capacity (usually 200–350 lbs). Exceeding it risks hitch failure.
Consider Roof or Rail Systems
- Roof carriers require lifting the chair overhead—high effort, not recommended for frequent use.
- Rail systems (e.g., for Whill or Smoov One) guide the chair into the vehicle using floor-mounted tracks. User must be able to drive the chair forward.
User note: Rail systems need floor anchoring and are model-specific.
Use Ramps and Vehicle Mods
Choose the Right Portable Ramp
For high trunks or hatches, use a foldable aluminum ramp. To avoid dangerous slopes:
– Use a 6:1 ratio (6 inches of ramp per 1 inch of height)
– A 20-inch-high trunk needs a 10-foot ramp
Warning: Short ramps on SUVs create steep angles—increasing fall and tipping risks.
Modify Your Vehicle
- Tilt or swing-away trunk hinges widen access.
- Side-entry vans with removable ramps offer low-floor entry.
- Remove middle seats in minivans and use a portable side ramp for DIY accessibility.
Budget option: Used accessible vans start at $8,000–$12,000—much cheaper than new conversions.
Pick the Right Vehicle
Match Car Type to Your Needs
| Vehicle | Best For | Loading Tip |
|---|---|---|
| SUV (Hatchback) | Spacious cargo, lower lip | Use a mat for sliding |
| Minivan | Wide doors, flat floor | Fold 3rd row for max space |
| Wagon/Crossover | Low loading height | Ideal for manual chairs |
| Accessible Van (WAV) | Full independence | Rear or side ramps, no lifting |
Key Features to Look For
- Low trunk height (<24 inches ideal)
- Fold-flat rear seats
- Power liftgate (hands-free opening)
- Hitch class and tongue weight rating
- Cargo space: Minimum 48″ x 30″
Test before buying: Bring your chair to a dealership and practice loading.
Choose a Transport-Friendly Wheelchair
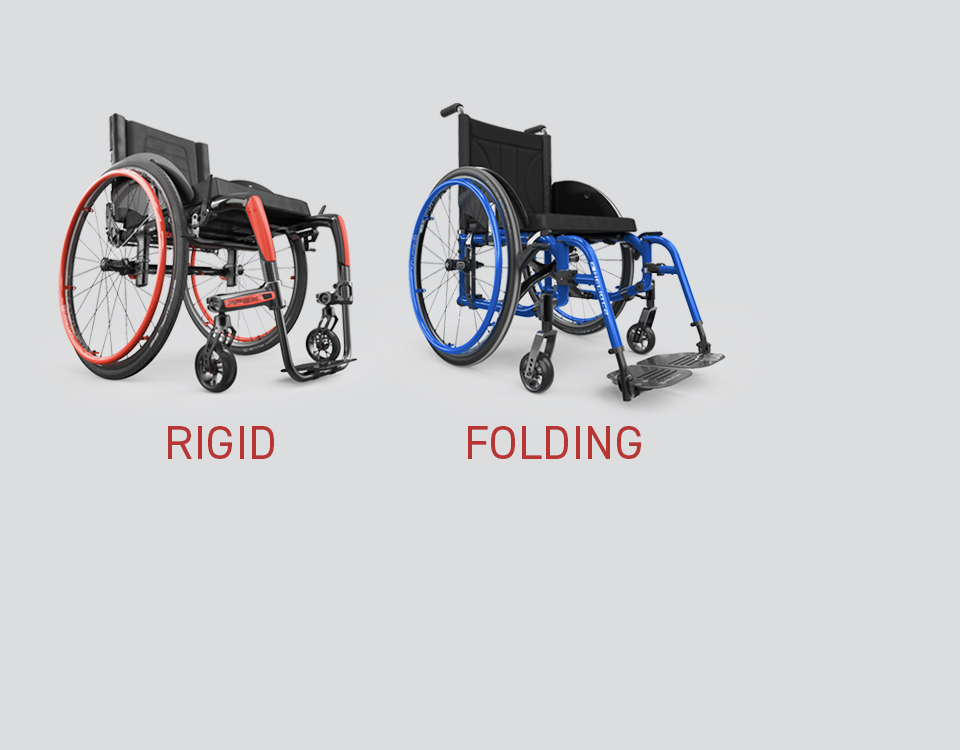
Folding vs. Rigid Frames
| Type | Pros | Cons |
|---|---|---|
| Folding | Collapses small, fits in trunks | Heavier, bulkier, back canes add height |
| Rigid | Lighter, lower profile, stronger | Doesn’t fold—requires wheel removal |
Example: The APEX C Carbon rigid chair weighs less and slides easier despite not folding.
Prioritize Lightweight and Quick-Release Parts
- Chairs under 20 lbs can be lifted solo.
- Quick-release wheels, armrests, and backrests save time and effort.
- Look for one-hand release mechanisms (e.g., NXT series).
Research-backed: Every pound reduced lowers propulsion effort and injury risk.
Prevent Injury and Fatigue
Avoid Shoulder and Back Strain
- Never lift with your back—this is the #1 cause of caregiver injury.
- Limit repetitive loading if you have chronic fatigue, myositis, or PEM.
- Use adaptive tools to eliminate lifting when possible.
User reality: “Every time I load it, I get hurt—gouge my hand, get pinched.” — Weird_Highlight_3195
Reduce Emotional Stress
Struggling with loading affects mental health and relationships. Investing in a folding power chair or hitch carrier can restore independence and reduce daily frustration.
Expert insight: “It’s cheaper to change your chair than your car.” — kjboston17
Follow the Loading Checklist
Before Loading
- ✅ Engage wheelchair brakes
- ✅ Remove footrests, cushions, armrests
- ✅ Fold or disassemble chair
- ✅ Clear vehicle space and lay down protection
During Loading
- ✅ Bend knees, keep back straight
- ✅ Lift with legs, grip frame or handles
- ✅ Slide or hoist chair into position
- ✅ Secure with straps if needed
After Loading
- ✅ Store accessories in cabin
- ✅ Confirm chair won’t shift during drive
- ✅ Close and lock trunk securely
Unloading
- ✅ Clear area around vehicle
- ✅ Slide chair to edge
- ✅ Tilt back, lower with control
- ✅ Reassemble and test before use
Match Solution to Your Needs
| Your Situation | Best Option |
|---|---|
| Manual chair, strong caregiver | Proper lifting + protective mat |
| Heavy chair, limited strength | Rigid lightweight model + quick-release parts |
| Power chair, no lifting ability | Trunk hoist or hitch-mounted carrier |
| Frequent travel, no vehicle mods | Folding/disassemblable power chair |
| Tight budget | Used accessible van + portable ramp |
Final truth: “You’re better off getting a purpose-built vehicle or one that can accommodate a purpose-built lift.” — Weird_Highlight_3195
Loading a wheelchair into a car doesn’t have to be painful or risky. With the right technique, equipment, and preparation, you can protect your body, preserve your equipment, and maintain your independence. Start with safe lifting, reduce weight through disassembly, and invest in adaptive tools when needed. Whether you choose a travel chair, a hoist, or a modified van, the goal is the same: safe, repeatable, and stress-free access to mobility. Test options in real conditions, consult users with similar needs, and prioritize solutions that let you focus on where you’re going—not how you’ll get the chair in the car.