Removing a wheelchair lift from a bus is a pivotal step in many skoolie, van, or shuttle conversions. Whether you’re reclaiming space for a kitchen, bed, or storage—or preventing ongoing water damage—this job unlocks your vehicle’s full potential. But with the lift weighing 400 to 600 pounds, the process demands careful planning, solid mechanical preparation, and strict safety protocols.
This guide delivers a complete, step-by-step breakdown of how to safely remove a wheelchair lift from a school bus or shuttle. You’ll learn how to disconnect power, identify mounting hardware, extract the heavy unit without injury, and resolve critical post-removal issues like brake interlocks that can leave your bus undrivable. Whether you’re a DIYer with basic tools or preparing for professional help, this article gives you the knowledge to move forward confidently.
Cut Power at the Source Before Touching Anything

Before loosening a single bolt, you must eliminate electrical risk. The last thing you want is an accidental lift deployment while you’re under the bus.
Disconnect the Battery First
Start by turning off all power. Locate the main battery compartment—commonly found under the driver’s seat, in a side bay, or beneath the chassis. Using insulated tools, disconnect the negative terminal first, then the positive. This breaks the circuit and prevents sparks or shocks.
Many buses also have a master disconnect switch near the driver’s area. Flip it off for an extra layer of safety.
⚠️ Critical Reminder: Even low-voltage control circuits can activate the lift. Always de-energize completely before proceeding.
Shut Off the Lift’s Dedicated Power Circuit
The wheelchair lift runs on its own high-amperage line, often protected by a 100A breaker or fused circuit.
Locate the Breaker or Control Box
Check these common spots:
– Near the battery pack
– Under the bus, close to the lift mechanism
– Inside an electrical panel under the driver’s console
For Ricon, Lift-U, or Braun models, find the main power disconnect and switch it off. Some units stay powered even when stowed, so don’t assume it’s safe just because the lift is up.
✅ Pro Tip: Label every wire with zip ties and tags. If you plan to resell the lift, keeping the harness intact increases its value.
Unplug the Wiring Harness
Most lifts use a multi-pin connector linked to a control module like the Vapor VCM. Carefully unplug it from beneath the bus.
If the lift is being scrapped:
– Cut wires cleanly with wire cutters
– Cap or tape exposed ends
– Bundle and remove excess wiring later
❌ Never leave live wires dangling—they can short against the metal floor and cause a fire.
Expose and Remove All Mounting Bolts

The lift is secured to the floor or frame with 8–12 heavy-duty carriage bolts, typically ½ inch or larger.
Identify Every Fastener
Use a flashlight to inspect under the bus. These bolts often have square shanks that fit into slots to prevent spinning. The nuts are underneath, so you’ll need to crawl beneath to access them.
⚠️ Warning: Some bolts also mount the air conditioning compressor. Remove the AC unit first if shared fasteners are present.
Handle Rusted or Seized Hardware
Spray each nut with penetrating oil (like PB Blaster) and let it soak for 15–30 minutes. If the bolt spins but won’t loosen:
– Use vice grips on the square shank above
– Hold it steady while turning the nut below
For frozen bolts:
– Use an angle grinder to cut off the heads
– Grind slowly to avoid damaging surrounding metal
❌ Never force the lift before all bolts are free—this can warp the base or crack floor supports.
Prepare for Safe Lift Extraction with Mechanical Aids
Manhandling a 500-pound lift is dangerous. You need mechanical help to lift, move, and lower it safely.
Choose the Right Lifting Equipment
Options include:
– Engine hoist (rentable from auto parts stores)
– Pallet jack or dolly
– DIY gantry system
– Chain hoist with overhead anchor
✅ Smart Strategy: If the lift still works, deploy it fully before removal. This lowers the center of gravity and makes unbolting easier.
Build a Stable DIY Gantry
Construct a temporary lifting frame:
– Use four 8–10 ft 2x4s for legs
– Add a 4×4 crossbeam (4 ft long)
– Secure joints with 3-inch lag screws
– Reinforce with X-bracing
– Mount a 1,500-lb hand-crank winch
Place it over the rear doorway, attach lifting straps to the lift, and raise slightly to relieve pressure on the bolts.
⚠️ Safety First: Test the gantry with a light load. Never stand under a suspended lift.
Extract the Lift Without Injury
Once unbolted, the lift must be removed with control and coordination.
Use a Team of 2–4 People
Assign roles:
– One person guides the lift
– Others stabilize and support weight
Wear steel-toed boots, gloves, and eye protection. A dropped lift can crush feet or cause amputation.
❌ Never work alone—this job is too risky.
Rotate and Tilt to Fit Through the Door
The lift may not fit straight out. Try:
– Turning it perpendicular to the doorway
– Tilting it diagonally
– Flipping it sideways using leverage
Many users report “wiggling” the unit out after rotating it—especially effective with a gantry providing slight lift.
✅ Real-World Tip: One builder used a gantry and diagonal tilt—removed a 430-lb lift in under two hours.
Lower Onto a Dolly or Trailer
Place a heavy-duty dolly or low trailer just outside the door. Use the winch or team lift to lower the unit slowly—never drop it.
Once on wheels, roll it away for storage, resale, or scrapping.
Inspect and Repair the Subfloor After Removal
With the lift gone, check for long-term water damage.
Look for Rust and Rot
Inspect for:
– Rust spots on steel floor plates
– Soft or spongy areas in wood layers
– Corrosion around bolt holes
Scrape off surface rust with a wire brush. Apply rust converter and primer.
For rotted wood:
– Cut out damaged sections
– Replace with marine-grade plywood
– Seal underside with bed liner coating (e.g., Line-X)
✅ Pro Tip: Reinforce the opening with steel plate if adding heavy furniture or rebuilding the floor.
Fix Post-Removal Electrical Interlocks

Many buses won’t shift or start after lift removal due to safety systems.
Diagnose Brake and Door Lockouts
Symptoms include:
– Can’t shift out of park
– “Door open” warning stays on
– Brake pedal feels locked
This happens because the vehicle thinks the lift is deployed.
🔧 Example: A 1994 TMC RTS bus stayed in “door open” mode after lift removal—fixed by adjusting the door limit switch.
Bypass the Interlock Safely
Options:
– Remove brake interlock relay (often labeled “lift” or “door”)
– Unplug control module (e.g., Vapor VCM)
– Simulate stowed position using:
– A strong magnet over magnetic sensors
– A jumper wire across switch terminals (temporary)
– Manually pressing the limit switch
⚠️ Caution: Only disable interlocks if emergency exit access remains. Never compromise safety permanently.
Convert Rear Door to Remote Operation (Optional)
Some owners want key fob control of the rear door after lift removal.
Tap Into the Existing Air System
If the door is air-powered:
– Locate the door solenoid valve
– Wire a momentary switch to activate it
– Add a key fob receiver and relay for wireless control
Ensure the system defaults to manual release during power failure.
💡 Innovative Idea: Install a residential steel door behind the original for insulation and security, while keeping the air mechanism functional.
Sell, Scrap, or Give Away the Lift
Don’t throw it away—it has value.
Maximize Resale Price
Functional lifts sell for $700+. To boost value:
– Clean thoroughly
– Test operation (if possible)
– Include wiring harness and control box
Advertise on:
– Craigslist
– Facebook Marketplace (Skoolie groups)
– VanLife forums
– Disability equipment resellers
❌ Reality Check: Some sellers get only $200. Price competitively.
Scrap for Metal
Most scrapyards accept lifts as ferrous metal:
– 400-lb lift = $20–$40
– 600-lb lift = $30–$60
Call ahead—some pay more for clean steel.
Offer Free Removal
Post: “Free wheelchair lift—must remove yourself”
Attracts scrap collectors, DIYers, and recyclers—saves you hauling.
Model-Specific Removal Tips
Braun L211U70ARS
- Weight: 452 lbs
- Disconnect power at 100A breaker
- Manuals available online—search “Braun L211U70ARS PDF”
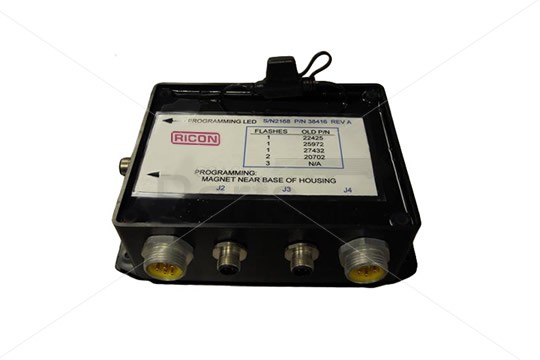
Ricon Lift
- Power via breaker at battery box
- Unplug control harness under bus
- May require depressurizing hydraulic lines
Lift-U FLX Metro 870
- Older models: Remove brake interlock relay
- Newer: Unplug from control box to disable
- Label wires—color codes vary
Final Checklist: Do’s and Don’ts
✅ Do:
- Disconnect battery first
- Label wires before cutting
- Use a gantry or hoist
- Remove AC compressor if shared bolts
- Inspect subfloor for damage
- Fix interlock issues before driving
- Consider selling or scrapping
❌ Don’t:
- Work alone
- Assume wiring is simple
- Force the lift out
- Ignore rusted bolts
- Deploy lift without securing it
Removing a wheelchair lift is a high-reward project that reclaims space, prevents decay, and may even pay for itself. With the right tools, teamwork, and caution, you can safely remove a 500-pound unit and prepare your bus for its next life. The lift is gone—but your build has just begun.