
Knowing how to replace wheelchair wheels is more than just a maintenance skill—it’s a gateway to independence, mobility, and adaptability. Whether you’re switching to off-road tires for weekend adventures, installing smoother-riding suspension wheels for city commutes, or simply replacing a damaged wheel after a flat, being able to change your wheels safely and efficiently keeps you moving on your terms. This guide walks you through every aspect of how to replace wheelchair wheels, from compatibility checks and tools needed to seated swaps, bolt-on replacements, and expert safety tips. Whether you transfer independently, need minimal help, or want to change wheels while staying seated, this comprehensive walkthrough ensures you can do it confidently and securely.
Why Replace or Upgrade Wheelchair Wheels?
Replacing wheelchair wheels isn’t only about fixing damage—many users swap wheels to match their environment, improve comfort, or boost performance. Upgrading or rotating wheel sets gives you the freedom to adapt quickly:
- Switch to wide tires for beach use or soft terrain
- Install pneumatic or suspension wheels (like Loop) to reduce vibration on bumpy sidewalks
- Use lightweight wheels for easier propulsion and travel
- Prepare for transport with compact, quick-disconnect wheels
- Keep clean wheels for indoor use after outdoor excursions
Pro Tip: Many experienced users keep multiple wheel sets—indoor, outdoor, and high-speed—ready to swap in minutes.
Types of Wheelchair Wheels and Their Best Uses
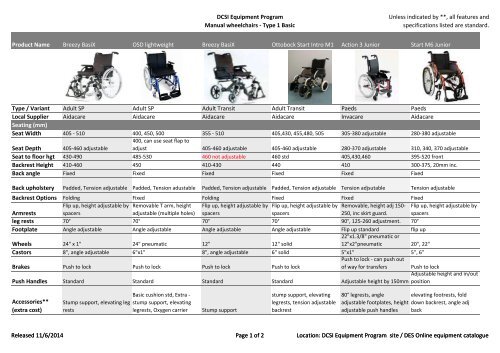
Understanding the different types of wheels helps you choose the right set for your lifestyle.
| Type | Best For | Key Features |
|---|---|---|
| Ultra-Lightweight | Daily use, travel | Minimal weight, quick-release axles |
| Suspension (e.g., Loop) | Urban commuting, e-assist | Shock-absorbing spokes, reduces joint strain |
| Off-Road | Trails, gravel, grass | Knobby treads, durable construction |
| Beach Wheels | Sand, soft terrain | Extra-wide tires, low ground pressure |
| Solid Tires | Low maintenance | Puncture-proof, no flats |
| Pneumatic Tires | Comfort, speed | Air-filled, better traction, e-bike rated options |
✅ Use pneumatic tires if you use an e-assist device (e.g., Baytech, Paw) and travel over 15 mph.
Check Compatibility Before You Buy New Wheels

Installing incompatible wheels can lead to safety hazards, poor performance, or damage to your chair. Always verify these key specs:
Rim Size and Bead Seat Diameter (BSD)
- Standard rear wheel size: 24 inches
- Critical spec: Bead Seat Diameter (BSD), not outer tire size
- 540 mm BSD: Most common
- 507 mm BSD: Found in some off-road wheels (e.g., Sun AT18)
❗ Mismatched BSD = tires won’t fit. Always verify before purchasing.
Tire Width and Frame Clearance
- Wider tires (e.g., 2.00″) may rub against armrests, footplates, or brakes
- Fix: Use 1/4″ aluminum spacers or longer axles
- Example: Schwalbe Big Apple 2.00″ tires fit with spacers
Axle Type and Length
- Quick-release axles: Standard on most manual chairs (~4.25″–4.5″ long)
- Bolt-on axles: Common in power chairs (e.g., Vive Compact)
- Offset hubs may shift axle pin position—test compatibility
✅ Reuse original axles when possible. When switching brands, confirm fit or order matching hardware.
Handrim and Brake Compatibility
- Most handrims use 6-tab mounting—standard across brands
- Ensure new wheels accept your current rims unless upgrading
- Changing tire diameter? Realign brakes—thicker tires raise wheel height
Tools You’ll Need by Wheel Type
The tools required depend on your wheelchair model and wheel design.
| Wheel Type | Tools Required |
|---|---|
| Quick-release | None |
| Bolt-on (e.g., Vive) | Flathead screwdriver, 3/4″ socket wrench |
| Solid tire install | Hot water, container (no tools needed) |
Prep Checklist
- Measure current wheels: diameter, width, axle type
- Verify frame clearance for wider tires
- Order matching spacers, washers, or axles if needed
- Source from trusted suppliers: Sportaid, Living Spinal, NSM
💡 Call Sportaid or Living Spinal for expert advice on complex swaps.
How to Swap Wheels While Seated (No Transfer Needed)
Ideal for users who can’t transfer but still want to adapt to terrain or clean wheels.
Step-by-Step Seated Wheel Swap
- Position chair beside support (door frame, sofa, wall)
- Engage brake on support side
- Rock chair sideways:
– One hand on support, other on push rim
– Push forward and pull back to tip chair - Stabilize upper body against support
- Press quick-release lever, slide wheel out
- Insert new wheel, hold button, align axle
- Listen for click, tug to test lock
- Lower chair carefully, repeat on other side
Stability Tips
- Door Frame Pivot: Use as fulcrum to lift wheel
- Sofa Tip: Angle chair, tip onto armrest (ensure sofa won’t slide)
- Side Lean (No Support): Only for users with core strength
🧠 Practice in a safe, open space first. This method takes coordination.
Independent Wheel Replacement (With Transfer)
For users who can transfer to a couch or bed for better access.
Step-by-Step Process
- Transfer to elevated surface (e.g., couch) for better leverage
- Unlock brakes, rotate chair for access
- Tilt chair onto one side:
– Lift using push rim and torso
– Rest on frame edge and single wheel
– Brace against wall or furniture - Press quick-release lever, slide wheel out
- Insert new wheel, hold button, push until it clicks
- Tug firmly to confirm lock
- Spin wheel—check for smooth rotation
- Return chair upright, repeat on other side
⚠️ Never attempt without stable support. Falls can cause serious injury.
Assistant-Assisted Wheel Change (Low-Strength Users)
Best for users with limited strength or balance.
Easy Two-Person Method
- User leans forward and to one side
- Assistant lifts rear frame slightly off the ground
- Remove old wheel, install new one
- No tipping required
- Repeat on opposite side
✅ Safest method for low-strength users. Minimal effort needed.
Replace Bolt-On Wheels (Power Chairs Like Vive Compact)
For power wheelchairs with fixed axles.
Tools Required
- Flathead screwdriver
- 3/4″ socket wrench
Step-by-Step
- Pry off rubber hub cap with flathead
- Remove two securing bolts with socket wrench
- Slide wheel off, keep:
– Lock washer
– Flat washer - Inspect internal magnet:
– Must be present and secure
– Missing = noise, sensor issues - Slide new wheel on, cap side first
- Reinstall flat washer, then lock washer
- Insert and tighten bolts (don’t over-tighten)
- Replace rubber cap
- Test spin: No resistance or noise?
🔍 Pro Tip: Always double-check washer order and bolt tightness.
Install Solid Tires with Hot Water (No Tools Needed)
Perfect for users with limited hand strength.
Why It Works
- Heat (160–180°F / 70–80°C) makes solid rubber elastic
- Expands tire for easier rim installation
Steps
- Heat water in container (not boiling)
- Soak new solid tire for 2–3 minutes
- Remove and install immediately:
– Slide onto rim while warm
– Use second person if needed - Ensure even seating
- Let cool—rubber re-hardens to firm state
✅ Ideal for users with limited hand strength. No tools, less strain.
Post-Installation Safety Check (Never Skip This!)
A loose or misaligned wheel can cause serious accidents. Always perform these checks:
6-Point Verification
- Tug Test: Pull firmly—wheel shouldn’t move
- Click Confirm: Quick-release lever fully engaged
- Spin Test: Wheel rotates freely, no wobble
- Alignment: Wheel parallel to frame, no tilt
- Clearance: No rubbing against armrests or brakes
- Brake Function: Engages/disengages smoothly
🔔 Warning: A “click” isn’t enough. Always perform a physical tug test.
Maintenance and Long-Term Care Tips
Keep your wheels reliable with regular checks:
- Inspect rims monthly for bends
- Check spokes for tension
- Examine axles and quick-release pins
- Look for tire wear—replace before rim damage
- Store in cool, dry place—avoid UV exposure
- Straighten bent rims at a bike shop (often cheaper than replacement)
- Use e-bike rated tires for speeds >15 mph (e.g., Schwalbe Big Apple)
“You might find a bike shop can true your wheels—saving you the cost of a full replacement.”
Best Wheel Choices by User Type
| User | Recommended Wheels | Notes |
|---|---|---|
| Traveler | Ultra-lightweight, quick-release | Fits in car trunks |
| E-Assist User | Suspension + pneumatic tires | Smooth at 15–20 mph |
| Outdoor Explorer | Off-road, knobby tires | Traction on trails |
| Beachgoer | Extra-wide soft tires | Prevents sinking |
| Low Hand Strength | Pre-assembled wheels, hot water install | Minimizes effort |
| Unstable Core | Assistant-assisted or bolt-on | Avoids tipping risks |
Final Tips for Success
- Buy complete wheel assemblies when possible—pre-mounted tires and handrims reduce errors
- Practice wheel swaps at home before relying on them in public
- Invest in quick-release axles for faster, tool-free changes
- Match specs exactly unless upgrading intentionally
- Call experts—Sportaid and Living Spinal offer free compatibility advice
“Changing wheelchair wheels isn’t just a repair—it’s a declaration of independence.”
Quick Reference: Key Specs & Suppliers
| Detail | Value |
|---|---|
| Common Wheel Size | 24″ |
| Standard BSD | 540 mm |
| Alternative BSD | 507 mm |
| Axle Types | Quick-release, bolt-on (3/4″) |
| Handrim Standard | 6-tab |
| E-Bike Rated Tires | Schwalbe Big Apple, Kenda Kwick Journey |
| Hot Water Temp | 160–180°F (70–80°C) |
| Soak Time | 2–3 minutes |
| Critical Safety Step | Tug test after install |
| Top Suppliers | Sportaid, Living Spinal, NSM |
Mastering how to replace wheelchair wheels empowers you to adapt, travel, and maintain your mobility on your terms. Whether you’re swapping for performance, terrain, or cleanliness, the right tools, compatibility checks, and safety steps make the process fast, safe, and independent. Start with one wheel set, practice the change, and build confidence—you’ll soon be switching wheels like a pro.