A flat tire on your wheelchair isn’t just an inconvenience—it can stop you in your tracks, disrupt your day, and compromise your independence. Whether you’re using a manual chair for daily mobility or rely on a power wheelchair like the Jazzy 6 Hunter, knowing how to perform wheelchair tire repair is a critical skill. The good news? Most tire issues are fixable with basic tools and the right know-how—especially if you have pneumatic (air-filled) tires, the only type that can actually be repaired.
Unlike solid or foam-filled tires, which must be replaced when damaged, pneumatic tires allow for inner tube patching or replacement, giving you a fast, cost-effective solution. This guide walks you through every step: identifying your tire type, diagnosing the problem, gathering essential tools, repairing or replacing tubes, and preventing future flats. You’ll also learn why foam and solid tires can’t be fixed—and what to do instead.
By the end, you’ll be equipped to handle most flat emergencies in under 30 minutes, whether at home or on the go. Let’s get you back on the move.
Identify Your Tire Type First
Before attempting any repair, you must know what kind of tire you’re working with. This determines whether you can fix it—or if replacement is your only option.
Pneumatic Tires: Repairable & Common
Pneumatic tires are air-filled rubber tires with an inner tube, offering the smoothest ride and best shock absorption. They’re ideal for outdoor use and rough terrain but are prone to punctures from glass, nails, or sharp debris.
- Can they be repaired? Yes—by patching or replacing the inner tube.
- Common symptoms of failure: Soft or spongy feel, visible deflation, hissing air.
- Best for: Users who prioritize comfort and mobility on uneven surfaces.
✅ Pro Tip: Check tire pressure weekly with a gauge. Most pneumatic tires perform best at 100–110 psi—but always confirm the max PSI on the tire’s sidewall.
Solid Tires: No Flats, No Repairs
Made from solid rubber or polyurethane, these tires never go flat and require minimal maintenance. However, they offer a harsher ride and transmit more vibration to your body.
- Can they be repaired? No. If cracked, split, or worn, they must be replaced.
- Common in: Indoor wheelchairs, lightweight models, or environments with high puncture risk.
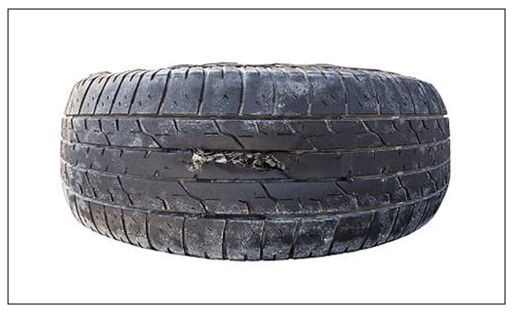
Flat-Free (Foam-Filled) Tires: Low Maintenance, Not Repairable
These tires use dense closed-cell foam instead of air, eliminating flats while offering a smoother feel than solid rubber. They’re popular on scooters and power chairs like the Jazzy 6 Hunter.
- Can they be repaired? No. Damage such as bulges, tread separation, or foam degradation means full replacement.
- Note: Foam may need trimming during rim replacement—use a sharp knife and avoid cutting the tire casing.
❗ Critical Insight: If your tire isn’t pneumatic, you’re not fixing it—you’re replacing it. Don’t waste time patching foam or solid tires.
Diagnose the Problem Accurately
Misdiagnosis leads to wasted effort. Start by asking: Is it really a flat?
Common Tire Issues & Causes
| Issue | Likely Cause | Solution |
|---|---|---|
| Soft or flat tire | Puncture, valve leak, underinflation | Patch or replace tube |
| Hissing sound | Active air leak | Locate with soapy water |
| Worn treads | Long-term use | Replace tire |
| Wobble or vibration | Bent rim, loose axle | Inspect wheel structure |
| Tire detached from rim | Age or impact damage | Replace tire |
Find Hidden Punctures With Soapy Water
For pneumatic tires, the fastest way to locate a leak is the soapy water test:
- Remove the wheel and slightly inflate the inner tube.
- Mix dish soap with water in a spray bottle or basin.
- Spray or submerge the tube.
- Watch for bubbles—they pinpoint the leak.
🔍 Alternative: Run your hand along the inside of the tire after removing the tube. Feel for glass, thorns, or wires that caused the puncture. Remove them before reinstalling.
Gather the Right Repair Tools
Using the correct tools ensures a safe, successful repair. Most are standard bicycle tools—affordable and widely available.
Essential Tools for Pneumatic Tire Repair
- Tire levers (x2): Plastic ones prevent accidental tube damage.
- Inner tube patch kit: Includes sandpaper, rubber cement, and vulcanized patches.
- Spare inner tube: Match size exactly (e.g., 25 x 1 or 23 x 559).
- Dual-valve pump: Handles both Schrader (car-style) and Presta valves.
- Wrench or socket set: For bolted wheels (e.g., 6mm for Jazzy 6 Hunter).
- Mini hand pump or CO2 inflator: Great for on-the-go repairs.
🎒 Pack a Travel Kit: Keep a compact bag with a spare tube, levers, patch kit, and mini-pump. Stay mobile even if you get a flat miles from home.
⚠️ Never Use Duct Tape: It fails under pressure. Only use tire-specific patches.
Repair a Pneumatic Tire: Step-by-Step
Follow this proven process to fix a flat safely and effectively.
Remove the Wheel Safely
- Quick-release wheels: Press lever and pull axle out.
- Bolted wheels: Use a wrench to remove nuts or cap screws.
🔌 Power Chair Safety: Turn off and unplug before working.
💡 Pro Tip: Mark the drive side (right wheel) with tape if removing both—ensures correct reassembly.
Deflate and Pry Off the Tire
- Press the valve core to release all air.
- Insert a tire lever between the bead and rim opposite the valve stem.
- Hook it onto a spoke and use a second lever to walk around the rim.
🛑 Avoid the push rim (on manual chairs) or drive shaft (on power chairs) when prying.
Extract and Inspect the Inner Tube
- Pull the tube out gently.
- Inflate slightly and test for leaks.
- Inspect the tire interior—run fingers inside to find sharp objects.
❗ Critical Rule: Never install a new tube without checking the tire first. Debris causes instant repeat flats.
Patch or Replace the Tube
Patch Small Holes (Under 3mm)
- Sand the area around the puncture.
- Apply rubber cement; let dry until tacky (5–10 min).
- Press patch firmly; hold 30 seconds.
- Wait 10+ minutes before reinflating.
✅ Best Practice: Patch only on the tube’s outer surface—not near the valve or sidewall.
Plug for Emergencies (Temporary Fix)
- Use a rubber plug and insertion tool.
- Pull plug through hole; trim excess.
⚠️ Warning: Plugs fail over time. Replace the tube as soon as possible.
Replace Tube for Large Tears
- Faster and more reliable than patching.
- Ideal for multiple punctures or sidewall damage.
💬 User Insight: Many prefer replacing over patching—it’s quicker and more dependable.
Reinstall Tube and Tire
- Slightly inflate new/repaired tube.
- Insert valve through rim hole first.
- Tuck tube inside tire casing.
- Seat one bead onto the rim by hand.
- Work second bead on gradually.
🛑 Caution: Don’t pinch the tube.
💡 Stuck? Let out a little air—the tube becomes more flexible.
Inflate to Correct Pressure
- Use a gauge-equipped pump.
- Target 100–110 psi (check tire sidewall for max PSI).
❌ Do not exceed max pressure—risk of blowout.
🔄 Recheck after 15 minutes—air may settle as tire seats.
Reattach and Test the Wheel
- Align axle with frame.
- Secure with quick-release or bolts (tighten in star pattern).
- Spin wheel: check for rubbing, wobble, or noise.
✅ Final Check: Tire evenly seated? Pressure stable? Smooth spin? You’re good to roll.
Replace Foam-Filled Tires (e.g., Jazzy 6 Hunter)
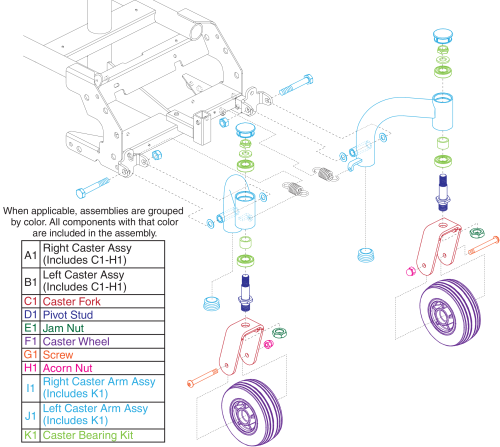
Since foam-filled tires can’t be repaired, full replacement is required when damaged.
Remove Cap Head Screws
- Locate four 6mm cap head screws on the hub.
- Remove and keep safe.
Clean the Hub and Shaft
- Wipe away dirt and old lubricant.
- Prevents seal wear.
Separate Tire from Rim
- Pry tire outward carefully.
- If replacing: remove air valve (if present).
Trim Foam if Needed
- Use sharp knife to cut foam flush—do not cut casing.
Reassemble Tire and Rim
- Align halves with valve stem.
- Insert five bolts by hand first.
- Tighten in crisscross pattern.
Reattach to Hub
- Slide onto drive shaft.
- Reinstall four outer cap screws.
- Tighten in star pattern.
✅ Result: Like-new performance and smooth operation.
Know Your Tire Size and Valve Type
Using the wrong parts leads to poor fit or blowouts.
Read the Sidewall Label
Look for:
– Size: e.g., “25 x 1” or “23 x 559”.
– Max PSI: Never exceed this.
📏 Action: Write down your tire size before ordering replacements.
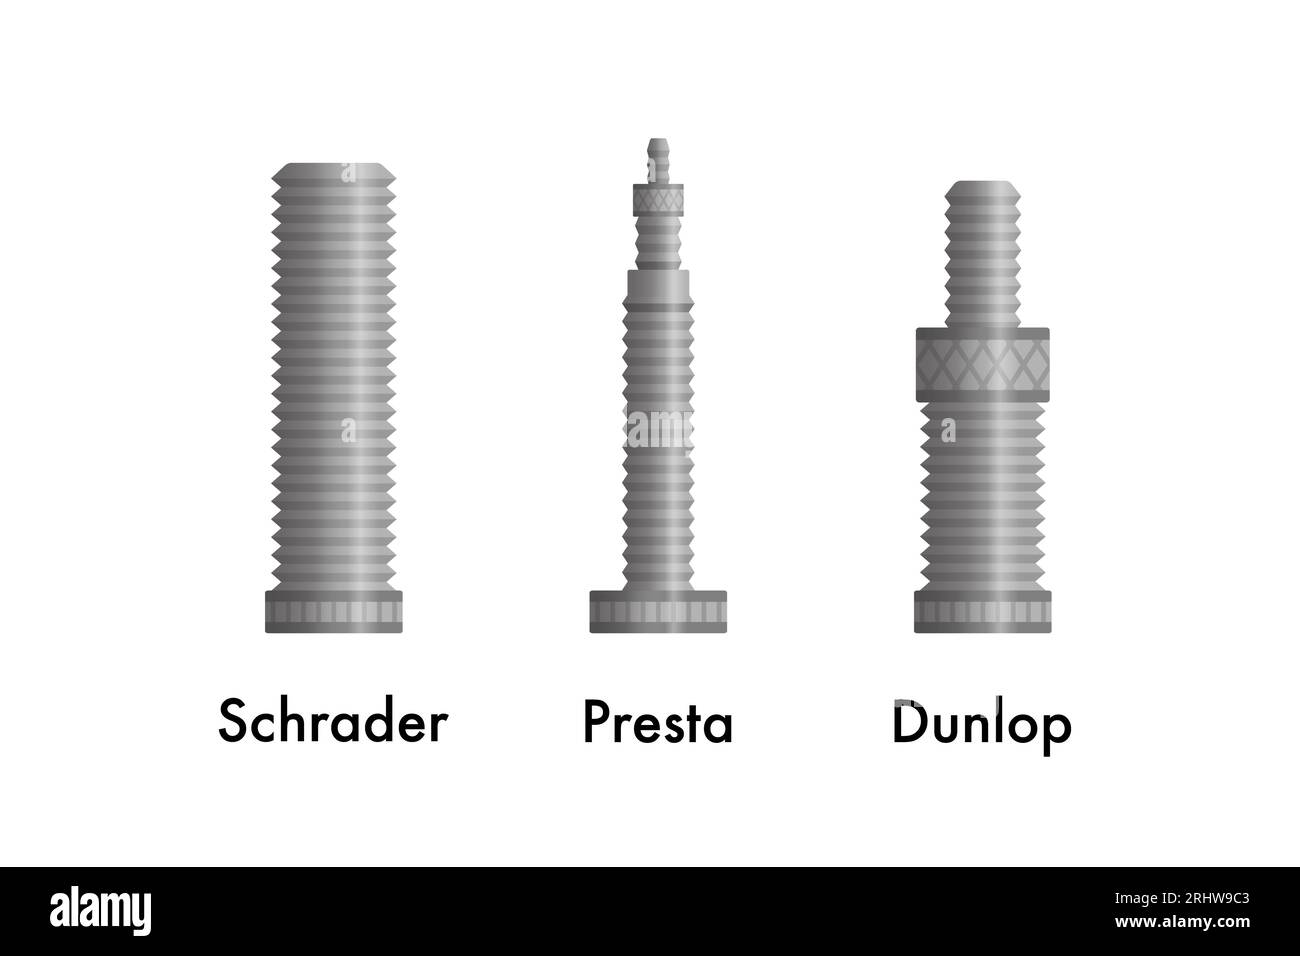
Identify the Valve
- Schrader Valve: Thick, car-style; most common.
- Presta Valve: Narrower, needs adapter.
🔧 Tool Tip: Use a dual-head pump to handle both types.
Prevent Future Flats With Smart Maintenance
Proactive care keeps you rolling.
Check Air Weekly
- Use a pressure gauge.
- Maintain 100–110 psi.
Inspect for Damage Daily
- Look for cracks, bulges, embedded debris.
Clean Wheels Regularly
- Wipe with damp cloth.
- Remove sand, dirt, road salt.
Avoid Hazards
- Steer clear of glass, curbs, sharp rocks.
- Use ramps instead of dropping off curbs.
Rotate Tires (If Possible)
- Swap front and rear tires occasionally.
- Promotes even wear.
🔄 Replace tires when: Treads are worn, rubber is cracked, or frequent flats occur.
Where to Get Help & Parts
Get Help From
- Bicycle shops: Many repair wheelchair tires—same tools, faster, cheaper.
- Mobility dealers: For warranty or insurance claims.
- Manufacturer centers: Best for complex systems.
💬 “My local bike shop fixed my wheelchair tire in 20 minutes—half the cost of the medical supplier.”
Buy Parts Online
- Amazon, Walmart, medical supply sites: Fast delivery.
- Brands: Drive Medical, Invacare, Mobility 2You.
📋 Insurance Note: Some plans require approved providers—check before DIY.
Master the Basics, Stay Independent
Fixing a wheelchair tire isn’t just about saving money—it’s about staying mobile on your terms. With basic tools, a spare tube, and the right know-how, you can handle most flat emergencies in under 30 minutes.
Remember:
– Only pneumatic tires can be repaired.
– Patch small holes, but replace tubes for reliability.
– Solid and foam-filled tires must be replaced.
– Prevent flats with weekly checks and hazard awareness.
🛠️ Empowerment Principle: “Knowing how to fix your own wheelchair isn’t just practical—it’s essential for independence.” – Verified user
By mastering wheelchair tire repair, you gain control, reduce downtime, and keep moving—no matter where life takes you.