Every dog deserves to feel the wind in their fur and the joy of movement—even after a spinal injury, degenerative disease, or paralysis. If your dog can no longer use their back legs due to conditions like IVDD (Intervertebral Disc Disease), FCE (Fibrocartilaginous Embolism), or degenerative myelopathy, a dog wheelchair can restore mobility, independence, and quality of life. While commercial carts from brands like K9 Carts or Eddie’s Wheels offer precision engineering and long-term durability, many pet owners turn to DIY solutions—especially when cost, availability, or urgency is a concern.
This guide shows you exactly how to make a dog wheelchair at home using affordable, easy-to-find materials. Based on real builds, veterinary input, and biomechanical principles, you’ll learn how to measure your dog accurately, choose the right frame and wheels, build a stable support system, and avoid common mistakes that could harm your pet. Whether you’re helping a Dachshund recover from IVDD or supporting a senior dog with weakening hind legs, this step-by-step plan gives you the tools to act with confidence and compassion.
Measure Your Dog Accurately Before Building
The success of a homemade dog wheelchair hinges on precise measurements. A poorly fitted cart can shift weight incorrectly, strain front limbs, or cause painful pressure sores. Always take these five key dimensions while your dog stands naturally on a flat surface, ideally with help to keep them still.
Shoulder to Tail Base Length
Measure from the base of the neck (just behind the shoulders) to the base of the tail. This determines the length of the side rails. For small to medium dogs, this typically ranges from 12 to 24 inches, but larger breeds may require longer frames.
Belly to Ground Height
Place a ruler or measuring tape from the floor up to the lowest point of your dog’s belly—the natural sag beneath the ribs. This measurement sets the axle height, ensuring the rear wheels lift the hindquarters without dragging or over-lifting.
Chest Width Across Ribs
Find the widest part of the ribcage and measure horizontally. This dimension dictates the length of the front crossbar, which connects the two side rails and stabilizes the frame.
Hip Width at Pelvis
Measure across the widest point of the hips. This ensures the support sling is wide enough to cradle the hind end comfortably without pinching or slipping.
Total Body Weight
Weigh your dog to select the right materials. PVC pipe works well for dogs under 30 lbs, but dogs over 40 lbs need stronger aluminum tubing to support daily use and outdoor terrain.
Pro Tip: Write down all measurements and double-check them. Even a 1-inch error can affect balance and comfort.
Choose the Right Frame Material and Wheels

The frame carries your dog’s entire weight, so material choice is critical for safety and performance.
PVC vs Aluminum: Which Is Right for Your Dog?
| Factor | PVC Pipe | Aluminum Tubing |
|---|---|---|
| Cost | $15–$30 | $50–$100+ |
| Weight | Light | Ultra-light and strong |
| Durability | Good for indoor/light use | Excellent for outdoor/long-term |
| Tool Requirements | Hand-cuttable; no welding | Requires saw, drill, possibly welder |
| Best For | Small dogs, temporary rehab | Medium/large dogs, full-time use |
Recommendation: Use 1″ diameter PVC for dogs under 25 lbs. For larger or more active dogs, aluminum tubing is safer and longer-lasting.
Selecting the Correct Wheels
Wheels must roll smoothly, handle different surfaces, and support weight without wobbling.
Rear Wheels (Primary Support)
- Under 20 lbs: 4″ solid rubber casters or stroller wheels
- 20–50 lbs: 6–8″ pneumatic bike tires
- Over 50 lbs: 10″ ATV-style or air-filled tires
Front Casters (Optional)
- 2–3″ swivel casters help with turning on smooth floors
- Not needed for grass or uneven ground—can interfere with traction
Warning: Avoid hard plastic wheels—they create vibration, heat up quickly, and can damage floors.
Build the PVC Frame: A Simple, Proven Design
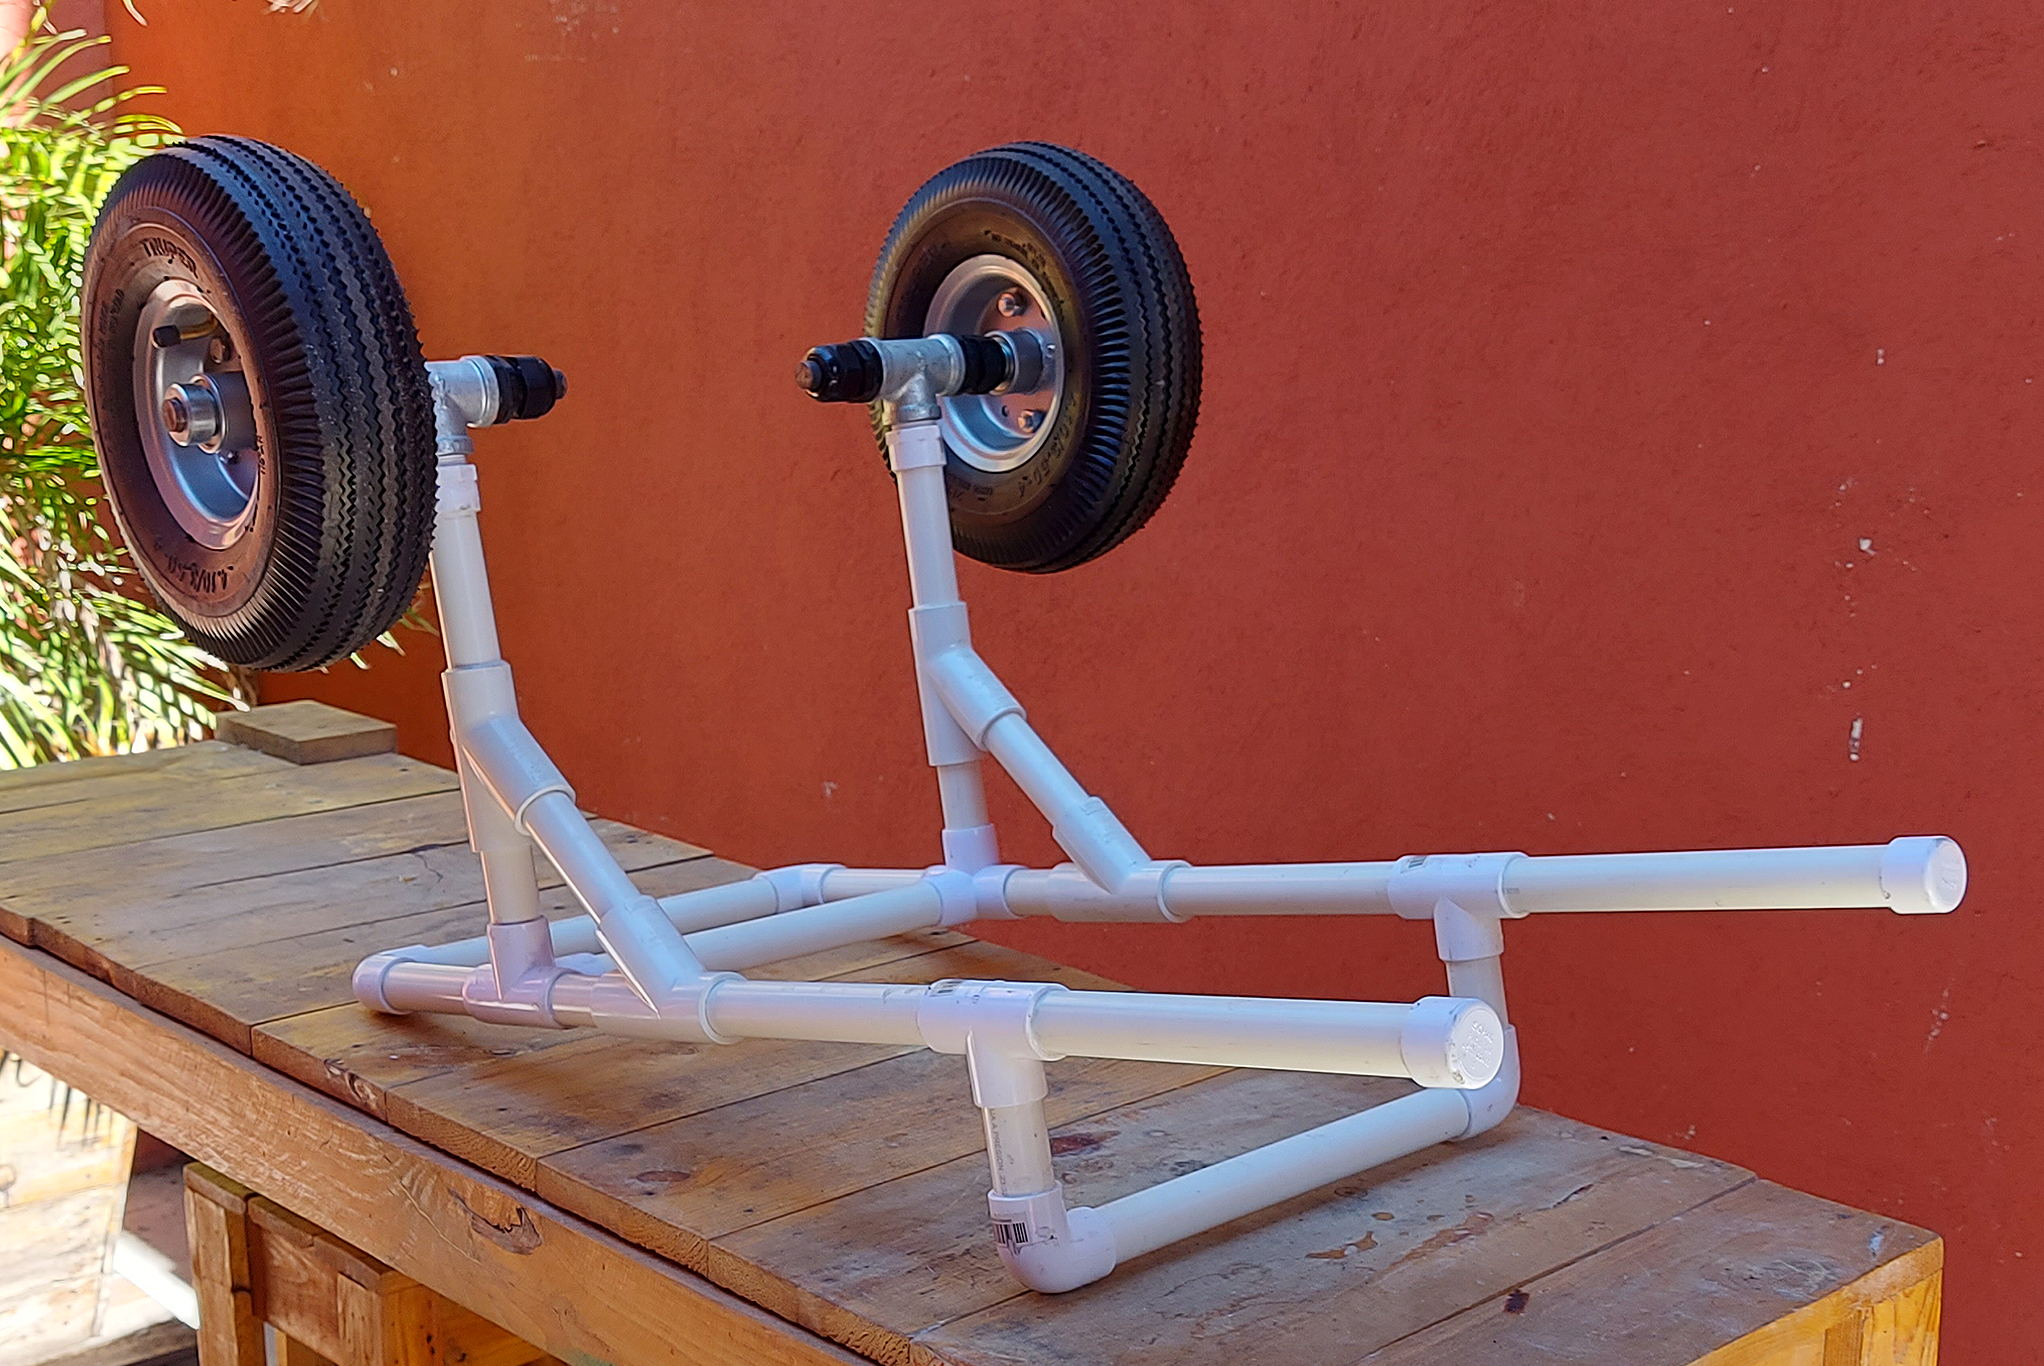
This beginner-friendly design uses PVC pipes and joints to create a rear-support wheelchair. It’s ideal for small to medium dogs and takes about 1–2 hours to assemble.
Cut and Assemble the Side Rails
Materials Needed:
– Two 36″ lengths of 1″ PVC pipe (side rails)
– Two 90° PVC elbows
– Two T-joints
– One crossbar (cut to chest width)
– PVC cement (optional, for permanent joints)
Steps:
1. Attach a 90° elbow to one end of each 36″ pipe.
2. Insert the vertical port of a T-joint into the other end of each elbow.
3. The T-joint’s side arm will hold a front wheel (optional); the top port connects to the crossbar.
4. Cut the crossbar to match your dog’s chest width and insert it into the top of both T-joints.
Visual Check: The frame should resemble a U-shape with forward-facing arms at the front.
Install the Rear Axle and Wheels
Proper axle placement is crucial—wheels must sit under the belly, not behind the tail, to distribute weight correctly.
- Cut a 4–6″ PVC segment to act as the axle holder.
- Attach it horizontally between the side rails, centered at the belly height.
- Drill a hole through the pipe and insert a metal rod or bolt as the axle.
- Slide on wheels, add washers, and secure with nuts on both ends.
Critical Adjustment: If your dog strains in the front legs, move the axle forward by 1–2 inches to shift weight backward.
Add Reinforcements and Safety Caps
- Use metal brackets at stress points (T-joints, axle mounts) to prevent cracking.
- Cap all open PVC ends with end caps to avoid injury.
- Sand rough edges with fine-grit sandpaper.
Design the Sling and Support System
The sling lifts the hindquarters and prevents skin damage from dragging. Without proper padding and positioning, sores and muscle atrophy can develop.
Create a Padded Abdominal Sling
Materials:
– Heavy-duty mesh (from a lawn chair or cargo net)
– 1/2″ thick closed-cell foam
– Zip ties, nylon webbing, or rivets
Steps:
1. Cut the mesh to fit under the belly and hips—about 8–12 inches wide.
2. Glue or sew foam padding to the top (contact) side.
3. Attach the sling to the frame using zip ties or straps wrapped around the side rails.
Avoid Spine Pressure: The sling should support the hips, not press on the lower back.
Attach Adjustable Harness Straps
Use 2″ wide padded nylon straps with quick-release buckles to secure the dog safely.
- Attach one strap just behind the front legs (chest anchor).
- Attach a second strap over the abdomen, above the hips.
- Connect both to the frame using D-rings or fixed loops.
Fit Check: You should fit two fingers under each strap. Too tight risks nerve damage; too loose causes slipping.
Test Fit and Adjust for Comfort

Never assume the first fit is perfect. Even small errors can make the cart uncomfortable or unsafe.
First Test Without Wheels
- Place the frame on the ground.
- Gently position your dog inside.
- Check that:
- The spine stays straight
- The hips are evenly supported
- Front legs aren’t stretched or compressed
Initial Mobility Test
- Attach wheels and help your dog stand.
- Support them lightly as they take first steps.
- Observe for 5–10 minutes in a safe, open space.
Watch for Warning Signs
| Symptom | Likely Cause | Fix |
|---|---|---|
| Dog leans on front legs | Wheels too far back | Move axle forward |
| Whining or pulling away | Chafing or pinching | Add padding or adjust straps |
| Body drags | Sling too low or loose | Tighten or reposition |
| Head hits frame when turning | Front arms too long | Shorten by 2–3 inches |
Success Sign: A relaxed gait, wagging tail, and eagerness to move mean the fit is working.
Upgrade with Advanced Features (Optional)
Once the basic cart works, consider enhancements for comfort and terrain.
Add Suspension for Rough Terrain
Use RC car shock absorbers mounted vertically between the axle and frame to reduce jolts on grass or gravel.
Install Swivel Front Casters
Attach 2–3″ swivel casters to the front ends of the side rails to improve turning on hardwood or tile.
Try a 3D-Printed Leaf Spring (Advanced)
A flexible leaf spring can replace a rigid frame, bending when the dog lies down and stiffening when standing—ideal for partial mobility support.
Maintain and Monitor Daily
A dog wheelchair requires ongoing care to stay safe and effective.
Weekly Maintenance Checklist
- Tighten all bolts and joints
- Inspect wheels for wear
- Check straps for fraying
- Clean sling with mild soap
- Sand any sharp edges
Skin and Hygiene Routine
- Examine contact points daily for redness or sores.
- Let your dog rest every 1–2 hours.
- Use diapers or pee pads if incontinent.
- Limit continuous use to 20–30 minutes at first.
Know When to Buy Instead of Build
DIY wheelchairs are great for temporary use or budget constraints, but commercial carts are better for long-term needs.
Choose a Professional Cart If:
- Your dog weighs over 50 lbs
- You lack tools or building experience
- Your dog needs full-time use
- You want an adjustable, vet-approved design
Real Example: One owner gave away a used Eddie’s Wheels cart—still functional after 3 years of daily use.
Final Tips for Success
Building a dog wheelchair is an act of love.
– Start simple—use PVC before upgrading.
– Prioritize balance—wheels under the belly reduce strain.
– Adjust slowly—make one change at a time.
– Supervise always—never leave your dog unattended.
– Join support groups—Reddit’s r/DIYdogcart offers real-time help.
“I didn’t build this to save money,” said one builder. “I built it to give my dog his dignity back.”
With care, precision, and patience, you can give your dog a second chance at mobility, freedom, and joy.